Every so often, it makes good sense to go into your network settings and forget some of the networks you have connected to previously. This makes sense from a security standpoint as it can prevent your PC from connecting automatically to a network when you don’t want it to. Here is how you can make your computer forget previous wireless networks with Windows 10.
- Right click the wireless icon on your taskbar. Select “Open Network & Internet settings”

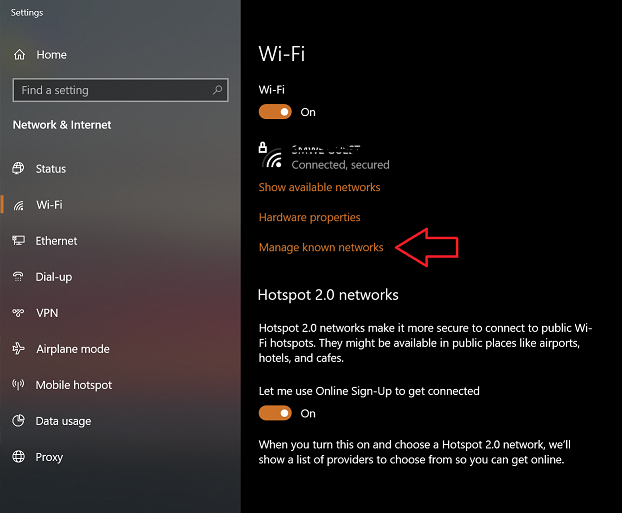
- In the left pane, click Wi-Fi.
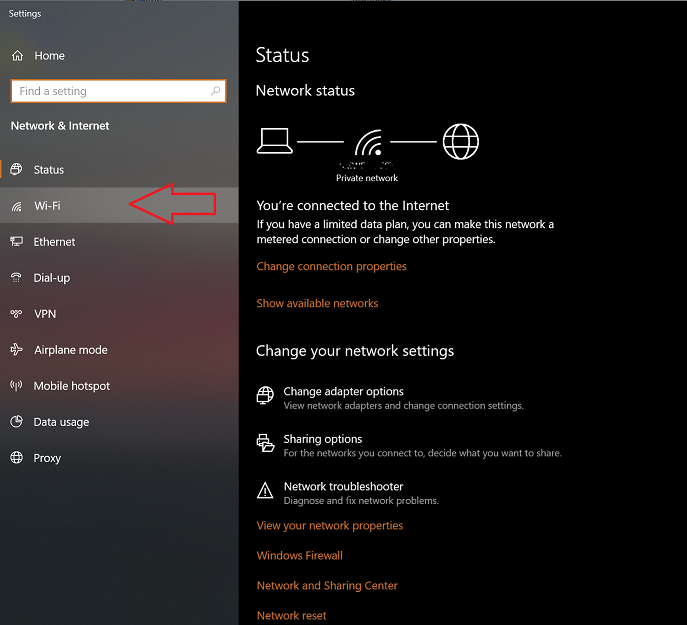
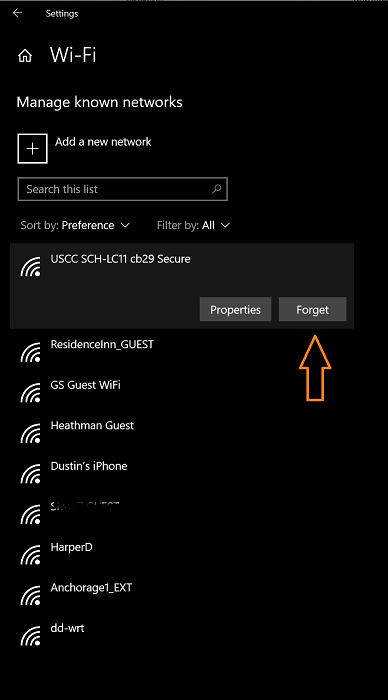
- Under Wi-Fi in the main pane, select “Manage known networks”
- Select the networks that you do not regularly connect to and click “Forget”. This will remove them from the list of networks and Windows will not connect to those networks automatically. Note: when reconnecting to a secure network, you will be required to re-enter the security key for that network.
Related Products on Amazon
Windows 10 Pro LicenseShop on Amazon
USB Boot DriveShop on Amazon
DDR4 RAMShop on Amazon
SATA SSDShop on Amazon
MSTechPages is a participant in the Amazon Services LLC Associates Program, an affiliate advertising program designed to provide a means for sites to earn advertising fees by advertising and linking to Amazon.com. As an Amazon Associate, we earn from qualifying purchases at no extra cost to you.